Introduction
The following post should reflect on the advantages and possible pitfalls when creating component based directives in AngularJS and is inspired by a number of excellent posts and articles around the subject, including "Thinking in React" and "How I've Improved My Angular Apps by Banning ng-controller".
AngularJS comes with directives out of the box, just think ng-repeat or the form tag.
Contrary to this approach most developers naturally tend to work with ng-controllers when starting to develop an application with AngularJS. It just seems more natural to think of ng-controllers as classic controllers in an MVC context, an intermediate between the model and the view.
So while directives are well known, they are more often than not used for adding new dom based features less to completely build the application based on directives itself. This is where the component based approach comes into play.
The Basics
Instead of relying on ng-controllers and large HTML files, we will try to group a certain functionality that might consist of multiple elements into components instead of creating quasi stand alone controllers and corresponding views.
The later works well when creating a minimal application but leads to a large number of problems when the application starts to grow. It's not clear how the data flows through the application just by looking at the template below.
Realistically you might have a hierarchy where controllers depend on other controllers without really understanding how the data is being accessed or mutated at first glance.
Take a look at the following HTML template:
<div ng-controller="MainController as mainCtrl" class="main">
  <input class="form-control"
    ng-model="mainCtrl.searchValue"
    ng-model-options="{ debounce: 100 }"
    id="search-box"
    placeholder="search" />

  <div class="items" ng-controller="SomeItemsController as fooCtrl">
    <ul class="active-items">
      <h3>Active Items</h3>
      <li ng-repeat="item in fooCtrl.someItems">
        <input type="checkbox" ng-click="mainCtrl.switchStatus(item)" checked="" />
            {{ item.name }}
      </li>
    </ul>
  </div>

  <div class="items" ng-controller="OtherItemsContoller as barCtrl">
    <ul class="inactive-items">
      <h3>Inactive Items</h3>
      <li ng-repeat="item in barCtrl.otherItems">
        <input type="checkbox" ng-click="mainCtrl.switchStatus(item)" />
          {{ item.name }}
      </li>
    </ul>
  </div>

</div>
The ng-controller/view combination appears to be simpler to work with at first glance, as we can access data via the $scope property or otherwise without really having to know where the data comes from or what effects it has if we start mutating the data.
This approach is problematic in a number of ways, including but not limited to:
Not reusable. Simply meaning we need to write similar controllers and markup over and over again.
No clear relationship between the controller and the view, as the view part is nested inside other views.
Data flow is hard to understand and control due to prototypal inheritance. Any child controller could mutate or access data from its parent controller via $scope.
Large Controllers Controllers tend to become large and hard to maintain. Breaking a large controller into smaller child controllers only shifts but doesn't solve the underlying problem.
Large HTML templates that are hard to understand or maintain.
Complicated to test. We can not easily isolate parts of the view to test the controller/view combination.
The introduction of the 'controller as' syntax solved a coupe of problems regarding ng-controllers include shadowing parent controller properties and functions for example and accessing the parent scope inside the view became more explicit.
This approach has benefits that we can leverage when writing directive controllers, especially the new bindToController property in ngDirective will ensure we don't have to inject the scope service if not necessary.
The Reason For a Component Based Approach
There is a large number of benefits to leverage from this approach:
Reusable Components - Instead of implementing similar ng-controller/views over and over again and bloating the template, this approach enables to create components that can be composed into bigger components.
Thinking about how the data flows.
Clear relationship between the view template and the controller via directives.
Isolated scope Only pass in the data that is needed for the component to behave as expected.
Reason about state This means distinguishing between components that simply render data and components that might need to keep a certain state or operate on the given data.
Components are testable Ensuring that components work as expected with Karma/Jasmine for example.
Example
We will build a UI component that will render a list of active as well as inactive items and a search box that will filter the lists according to a given input. Sounds trivial and is actually trivial but should really highlight the thinking process.
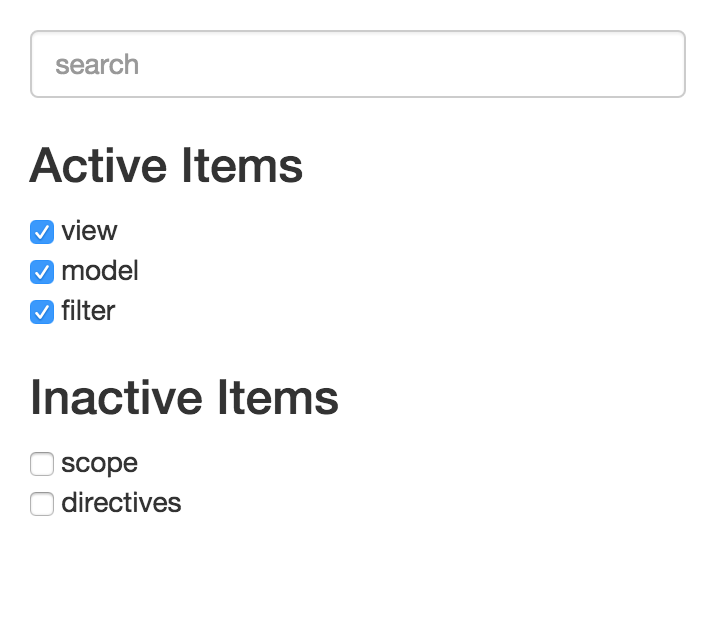
A closer look at the UI reveals the opportunity to group certain elements into basic components and compose those basic components into even bigger components.
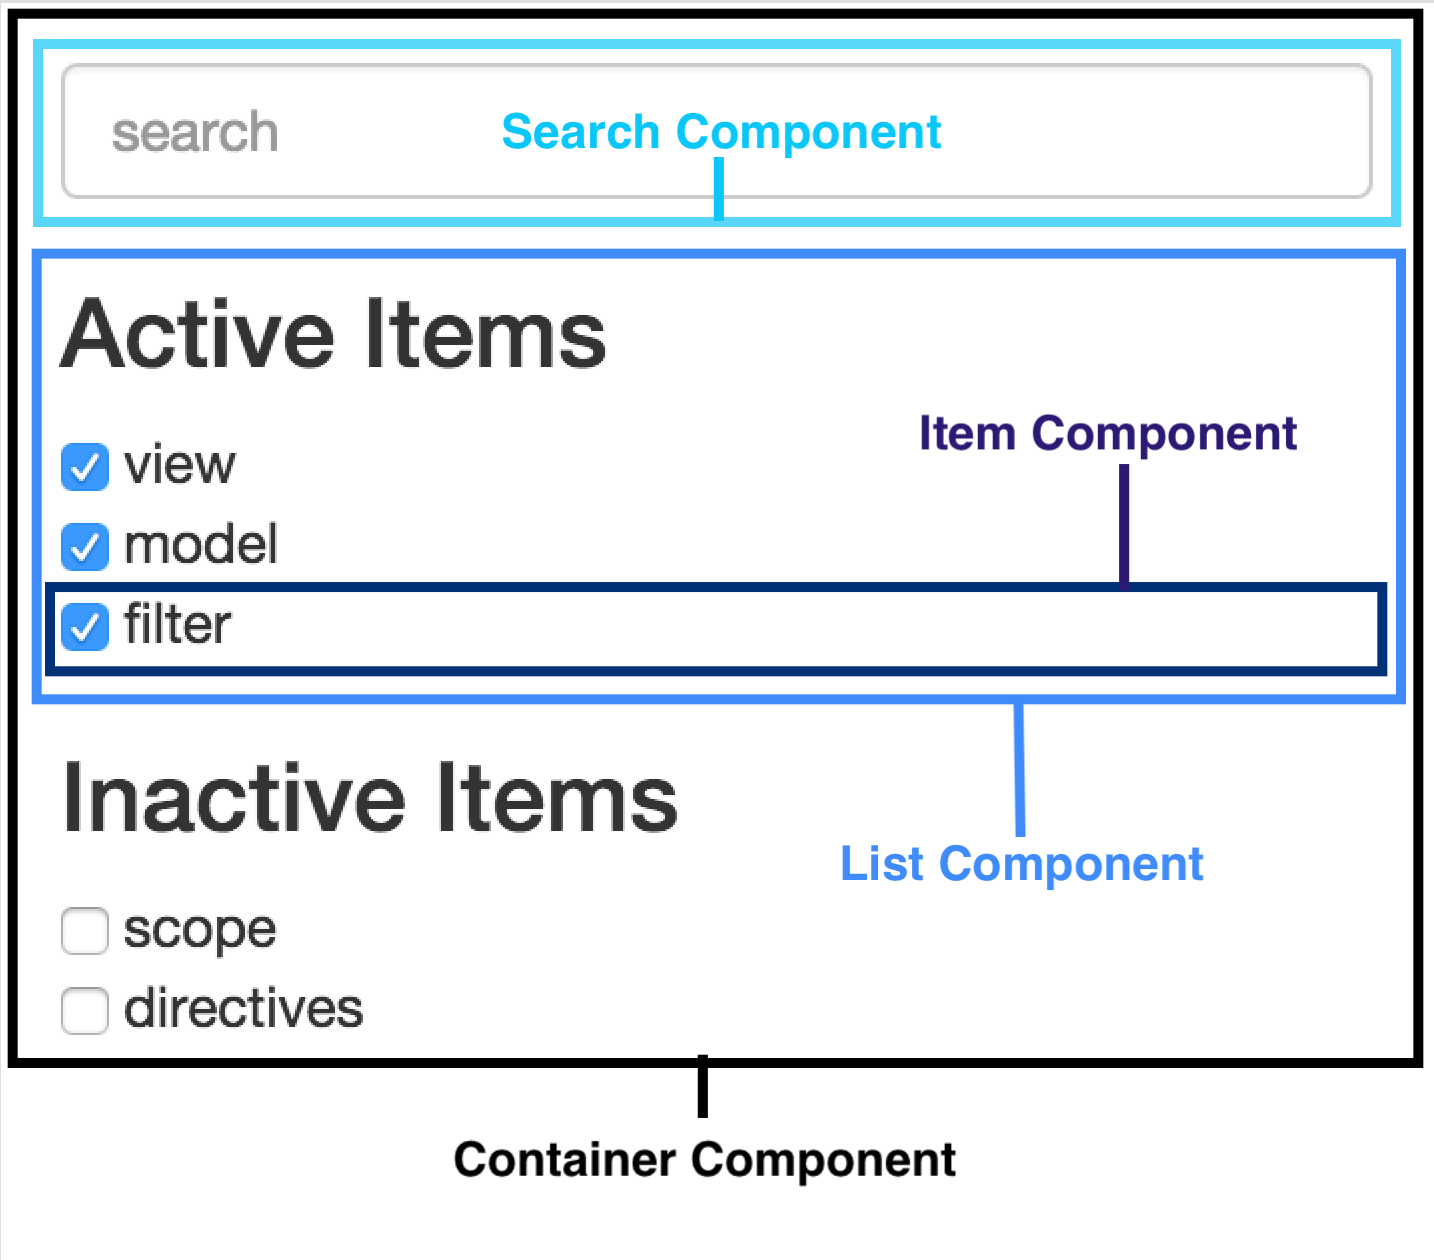
We can actually identify three basic components and one container that composes the single parts into something bigger.
The main container composes the search box as well as the list and the list consists of a number of item components.
We will start off with most basic component the item. All it does is render a checkbox and a name.
The directive consists of an isolated scope that accepts two properties, the item itself, which is the data object containing name and activity status and the onClick callback. The item doesn't operate on the data, what it actually does is trigger the callback via the ng-click.
The template is inlined not in a separate file, we could also easily move the template code into its own file if needed. The controller is empty obviously, as we only want to render the data and not operate on it.
app.directive('item', function() {
  return {
    scope: {
      item: '=set',
      onClick: '&'
    },
    replace: true,
    controller: function() {},
    controllerAs: 'ctrl',
    bindToController: true,
    restrict: 'EA',
    template: '<input type="checkbox" ng-click="ctrl.onClick({item: ctrl.item})" ng-checked="ctrl.item.active" /> '
  }
});
The item directive is usable already. The following line would render foobar and a checked checkbox.
<item data-set="{name: 'foobar', active: true}"></item>
Nothing special so far. Next we will create the list component which can be reused to render the active as well as the inactive item lists.
The itemsList directive expects a title and a collection of items. Using an isolated scope enables us to only pass the data that is really needed. We can use one-way binding to pass in the title and use two-way binding for the data. One-way binding due to the fact, that we are passing in a string and we only want render the title not change it.
app.directive('itemsList', function() {
    return {
        scope: {
            title: '@',
            items: '='
        },
        restrict : 'EA',
        controller: function() {},
        controllerAs: 'ctrl',
        transclude: true,
        bindToController: true,
        templateUrl: 'items-list.html'
    }
});
The template simply consists of the following markup for now:
<div class="items-list">
  <h3></h3>
  <span ng-if="ctrl.items.length == 0">No items available.</span>
  <ul class="items">
    <li ng-repeat="item in ctrl.items">
      <item data-set="item"></item>
    </li>
  </ul>
</div>
By using the controllerAs and the bindToController features in the directive definition we now have to write ctrl.items not just items inside the template. The items list views displays a title and converts a given set of items to single row item directives.
The main HTML looks like this:
<body ng-app="app">
    <items-list data-title="Active Items" data-items="[{name: 'foo', active: true}, {name: bar, active: false}]"></items-list>
    <items-list data-title="Inactive Items" data-items="[{name: 'foo', active: true}, {name: bar, active: false}]"></items-list>
</div>
We get the following result when rendering the page:
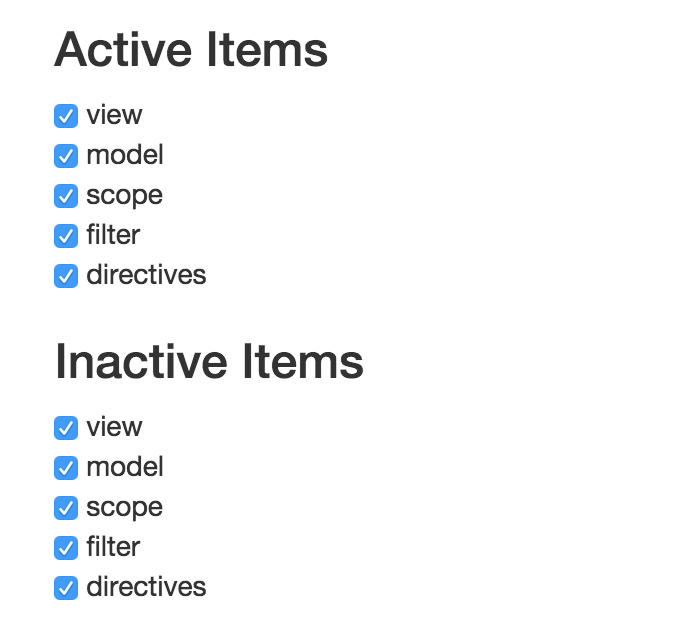
Nothing special going on here so far. We have two lists that have different titles but render the exact same items. This is obviously due to the fact that we are passing in the same set of items. The next step will include explicitly setting the correct data for each of the itemList components.
Further more clicking the checkbox doesn't do anything, so we will need to add some clicking behaviour as well.
The actual behaviour and the corresponding data handling should not be implemented inside the itemsList directive.
This is where the main container comes into play. The main container knows where to retrieve the data and how to handle updates, the container also knows what the components need to function properly.
We will create an ItemsContainerController that loads the initial data and handles the update cycle and implement a switchStatus function that gets called as soon as a user clicks on a checkbox.
switchStatus handles the items current activity setting it from true to false and vice versa.
app.controller('ItemsContainerController', ['ItemsService',
  function(ItemsService) {

    // load the data
    var items = ItemsService.fetchAll(),
        self = this;
    // ...

    this.switchStatus = function(item) {
      item.active = !item.active;
      items = ItemsService.update(item);
      updateItems();
    };

    // ...
]);
The directive code is self explanatory.
app.directive('itemsContainer', function() {
  return {
    controller: 'ItemsContainerController',
    controllerAs: 'ctrl',
    bindToController: true,
    templateUrl: 'items-container.html'
  };
});
After implementing the switchStatus function we also need to add a new property onClick to the isolated itemsLists scope and use expression binding to execute the function in the proper scope. For more information on & binding consult the Angular documentation.
app.directive('itemsList', function() {
    return {
        scope: {
            title: '@',
            items: '=',
            onClick: '&'
        },
        restrict : 'EA',
        controller: function() {},
        controllerAs: 'ctrl',
        transclude: true,
        bindToController: true,
        templateUrl: 'items-list.html'
    }
});
The main container HTML template needs to be updated with the previously defined callback:
<div class="main">
    <items-list data-title="Active Items"
                data-items="activeItems"
                data-on-click="switchStatus(item)"></items-list>

    <items-list data-title="Inactive Items"
                data-items="inactiveItems"
                data-on-click="switchStatus(item)"></items-list>
</div>
The HTML file consists of the ng-app declaration and the items-container directive now.
<body ng-app="app">
    <items-container></items-container>
</div>
At this point we already have a functional application that displays two different lists. Furthermore an item's activity can be set to true and false. Check the code for the full implementation.
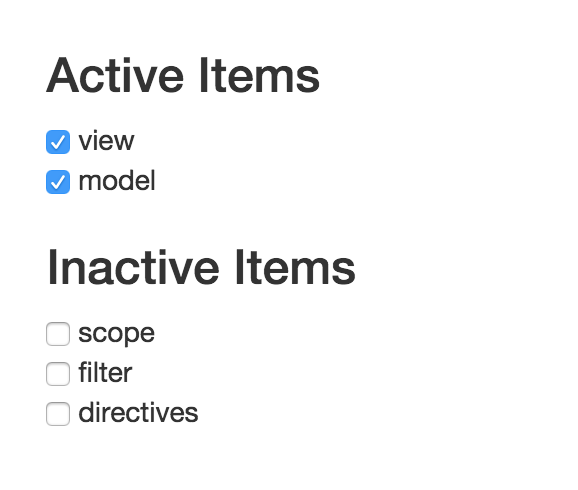
Next up is the search box that filters the list according to the user input.
Obviously one could argue that there is no use in defining a searchBox directive when a simple input field would do the job. The underlying idea here ist that the search box might also have an optional checkbox which would only filter on active items for example or have a submit button. The directive definition is minimal and the external template consists of an input field and the occasional ngAttributes.
<div class="search-box">
    <input class="form-control"
           ng-model="ctrl.searchValue"
           ng-model-options="{ debounce: 100 }"
           id="search-box"
           placeholder="search"
           ng-change="ctrl.onChange({search: ctrl.searchValue})"/>

</div>
app.directive('searchBox', function() {
 return {
   scope: {
     onChange: '&'
   },
   controllerAs: 'ctrl',
   controller: 'function() {}',
   bindToController: true,
   templateUrl: 'search-box.html'
 };
});
The interesting part is the onChange property on the isolated scope. Our search box doesn't really know anything about the itemLists directive all it knows is that as soon as the user types in something into the input it triggers a callback via ng-change. Using ng-change avoids having to setup a $watcher inside the controller.
ItemsContainerController includes a function that takes care of filtering the items and passing the updated data back in to the itemsList directives.
The searchBox directive doesn't handle any data changes all. All it knows is that it has to trigger a callback as soon as its internal search value has changed, which makes the search box reusable.
The container HTML template has slightly changed, but is still easy to understand. The required search box callback is passed via the on-change attribute.
<body ng-app="app">
  <div class="main">
    <search-box data-on-change="updateFilter(search)"></search-box>
    <items-list data-title="Active Items" data-items="activeItems" data-on-click="switchStatus(item)"></items-list>
    <items-list data-title="Inactive Items" data-items="inactiveItems" data-on-click="switchStatus(item)"></items-list>
  </div>
We have a fully functional application at this point. The itemsContainer component offers features like changing the item status and list filtering via the search box. Check the code for the complete implementation.
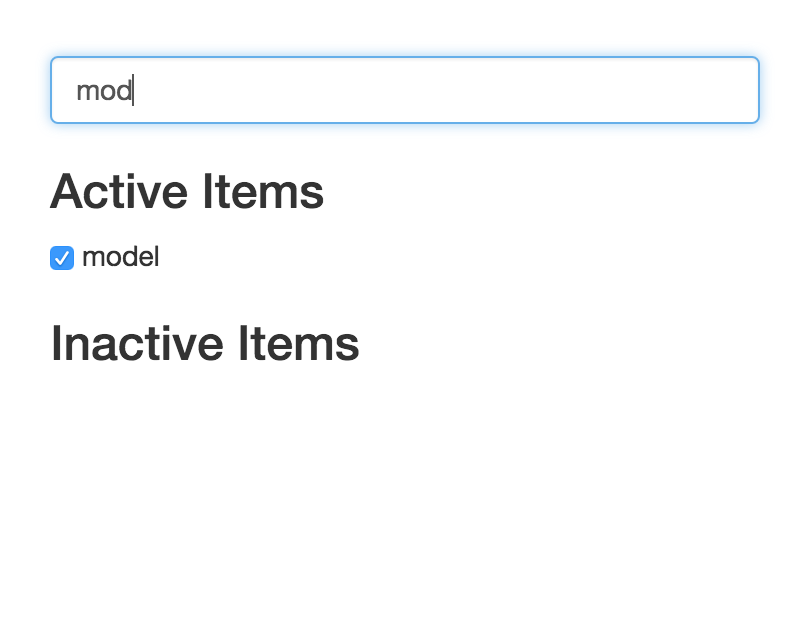
Finally, we could also add a bonus searchBox directive functionality: when the 'only active' checkbox is checked search in the active items list only.
By reusing the item component we can extend the search-box template to render a checkbox with customized text and clicking behaviour.
<div class="search-box">
    <input class="form-control"
           ng-model="ctrl.searchValue"
           ng-model-options="{ debounce: 100 }"
           id="search-box"
           placeholder="search"
           ng-change="ctrl.onChange({search: ctrl.searchValue, active: ctrl.onlyActive})"/>

    <item data-set="{name: 'Only active items'}" ng-click="ctrl.onlyActive = !ctrl.onlyActive"></item>
</div>
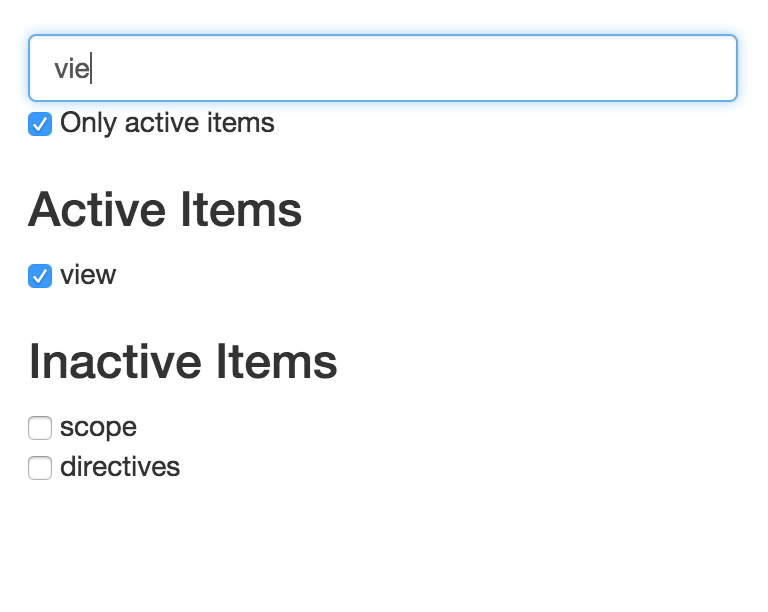
Check the updated code for the full implementation.
Roundup
Our example component should highlight the benefits and drawbacks when taking the component based approach. By breaking our UI into components we were able to completely ban the scope service form all the controllers. The higher up components pass the data on to the lower level components which in part means we gain control over how the data flows. Of course we still have two-way binding on certain properties, which means that a child component could still mutate the parents data. This is something this post didn't set out to achieve but should be kept in mind.
The obvious drawback in our example implementation is that we need to write a lot more code. Alone defining single directives for every component means writing a lot of code compared to defining ng-controllers and passing the data around via prototypal inheritance. What this post also didn't cover is the testing aspect, this will be covered in an upcoming post.
Thinking component based is definitely something to consider when creating applications in AngularJS even with the drawback of having to write more code. For more information on the topic and alternative approaches visit the links below.
Links
How I've Improved My Angular Apps by Banning ng-controller